
Loving the TT-02RA
We are back! I hope you had a Happy Easter and got to enjoy a wonderful weekend with your friends and family. Now, it is time to be a kid again! I am working on a fancy paint job for the Slash and so that is coming up!
Why the TT-02RA?
Now, I am back to a parallel project: my TT-02RA. One of the things that has ALWAYS frustrated me about the TT02RA chassis is the steering. Some of this is my childhood ways. I mean, who does not want to take a car out and practice that perfect 4WD drift in a rally car? Well, this winter I packed the steering with snow, and it pulled apart. I had to find the parts and put the steering back together. I know, I am suffering from first-world problems. Break out the violins and play me some sad music.... or we can get over it and find a solution.
I have not been secretive about my love for Tamiya. Tamiya has been building models since Moses walked out of Egypt. In fact, I am pretty sure that in his downtime, he played with RC cars. Or maybe he was before the company’s 1947 start date. Yoshio Tamiya may have been producing wooden models after Moses walked the earth, but a guy can have a creative RC fantasy right? I do believe that if Yoshio Tamiya wandered the wilderness with Moses’ group, they would have had some epic RC races and probably stayed out of a lot more trouble.

(This is not an actual picture of Moses playing with RC cars in the desert, but just a reenactment…. Or it could be the consequence of Chat GPT and my weird mind.)
I bet Moses got one for free! LUUCKY (Napoleon Dynamite voice plugin engaged) I have heard people tell me that RC cars are so expensive to buy. Remember, Tamiya builds an RC model for every budget. I bought my TT-02RA for 110 bucks. That is a screaming deal! I did add Fast Eddie bearings and Tamiya oil filled shocks. I do not know the current price of those items, but I want to say that all in the car is up to about 180 with servo and upgrades. If you are going to buy one for your first car then don’t worry about the upgrades. Build the car and learn how to drive it. I will do another post on the upgrades on this car. When I get a good looking body finished for this car then I will post pics of the whole car. For now, it is time to get back to the topic at hand: the steering.
The Steering Upgrade
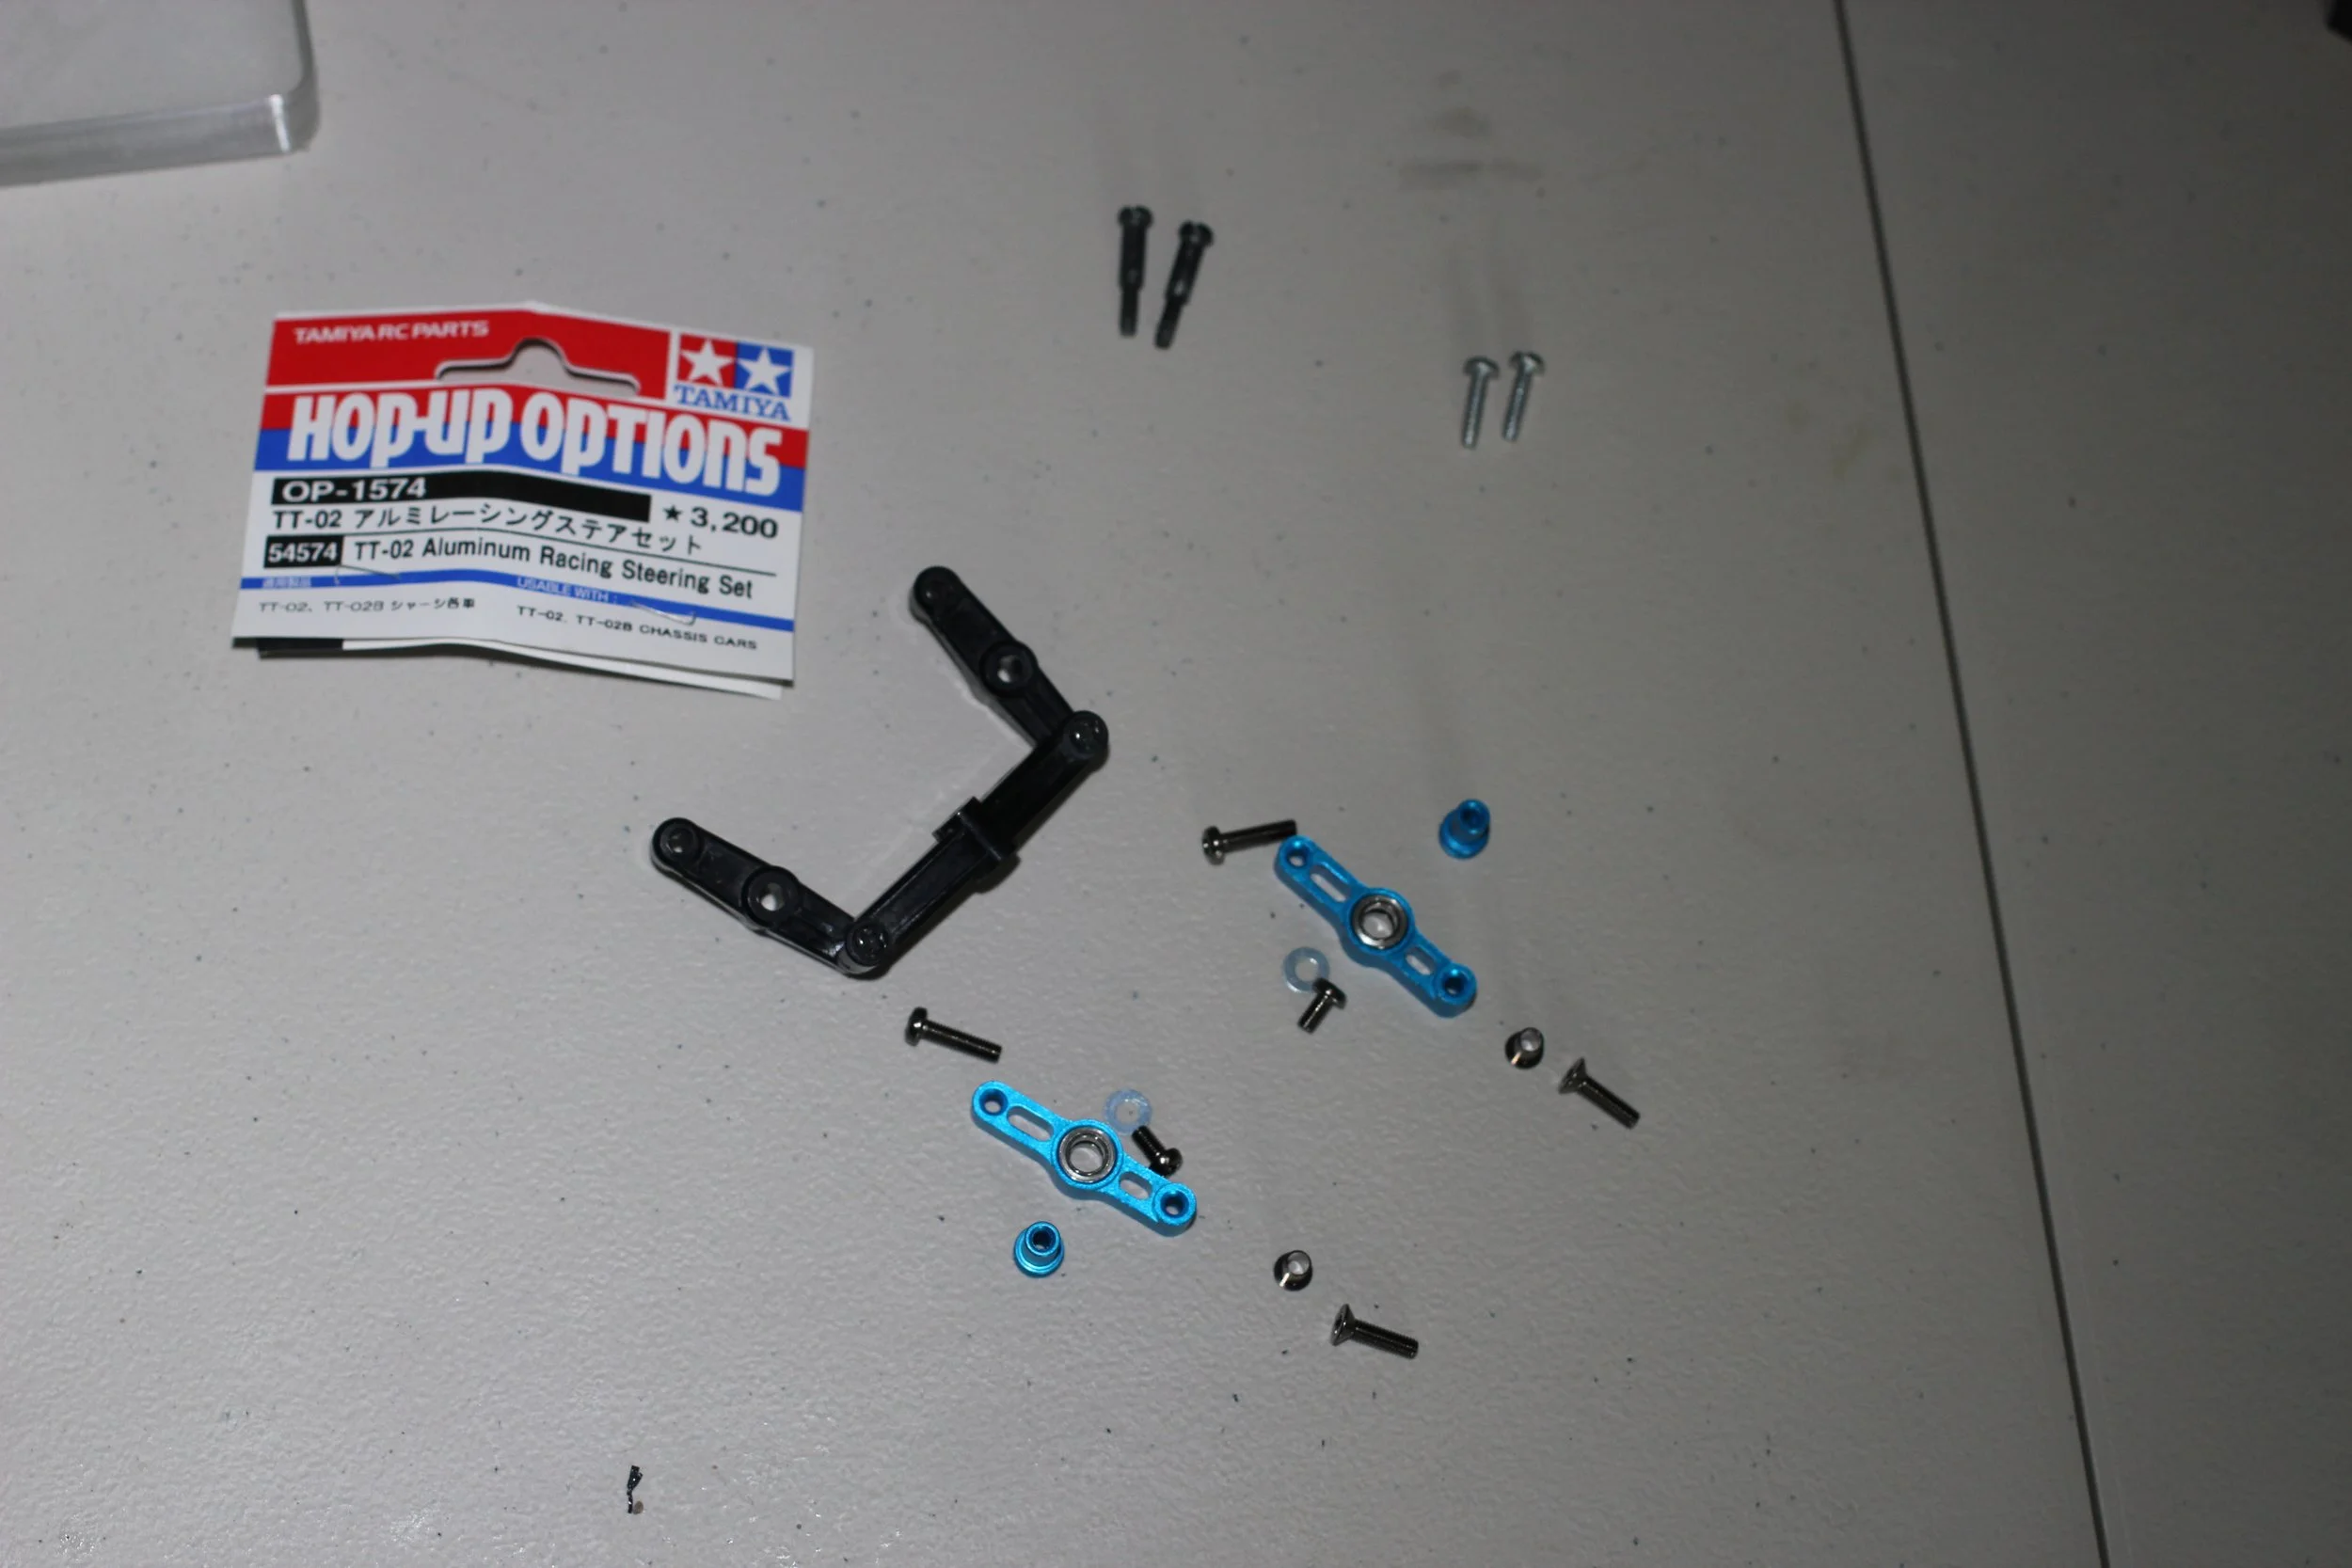
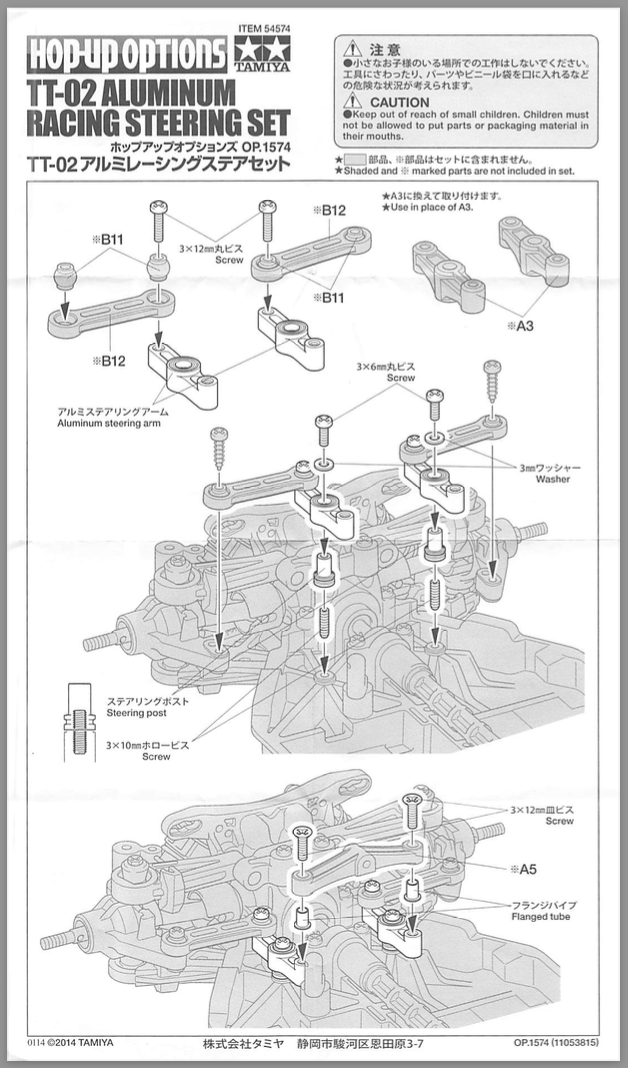
1) The first thing I did is I read the directions…. Just kidding…. first, I laid out the parts, guessed, and then I read the directions. I did not figure out all the correct places for the washers and little bits, but I got close. I scanned the directions and uploaded them here. I wanted to make sure that all washers and bits go where they are supposed to go. The picture of the parts is below, and then directions are below the pic.
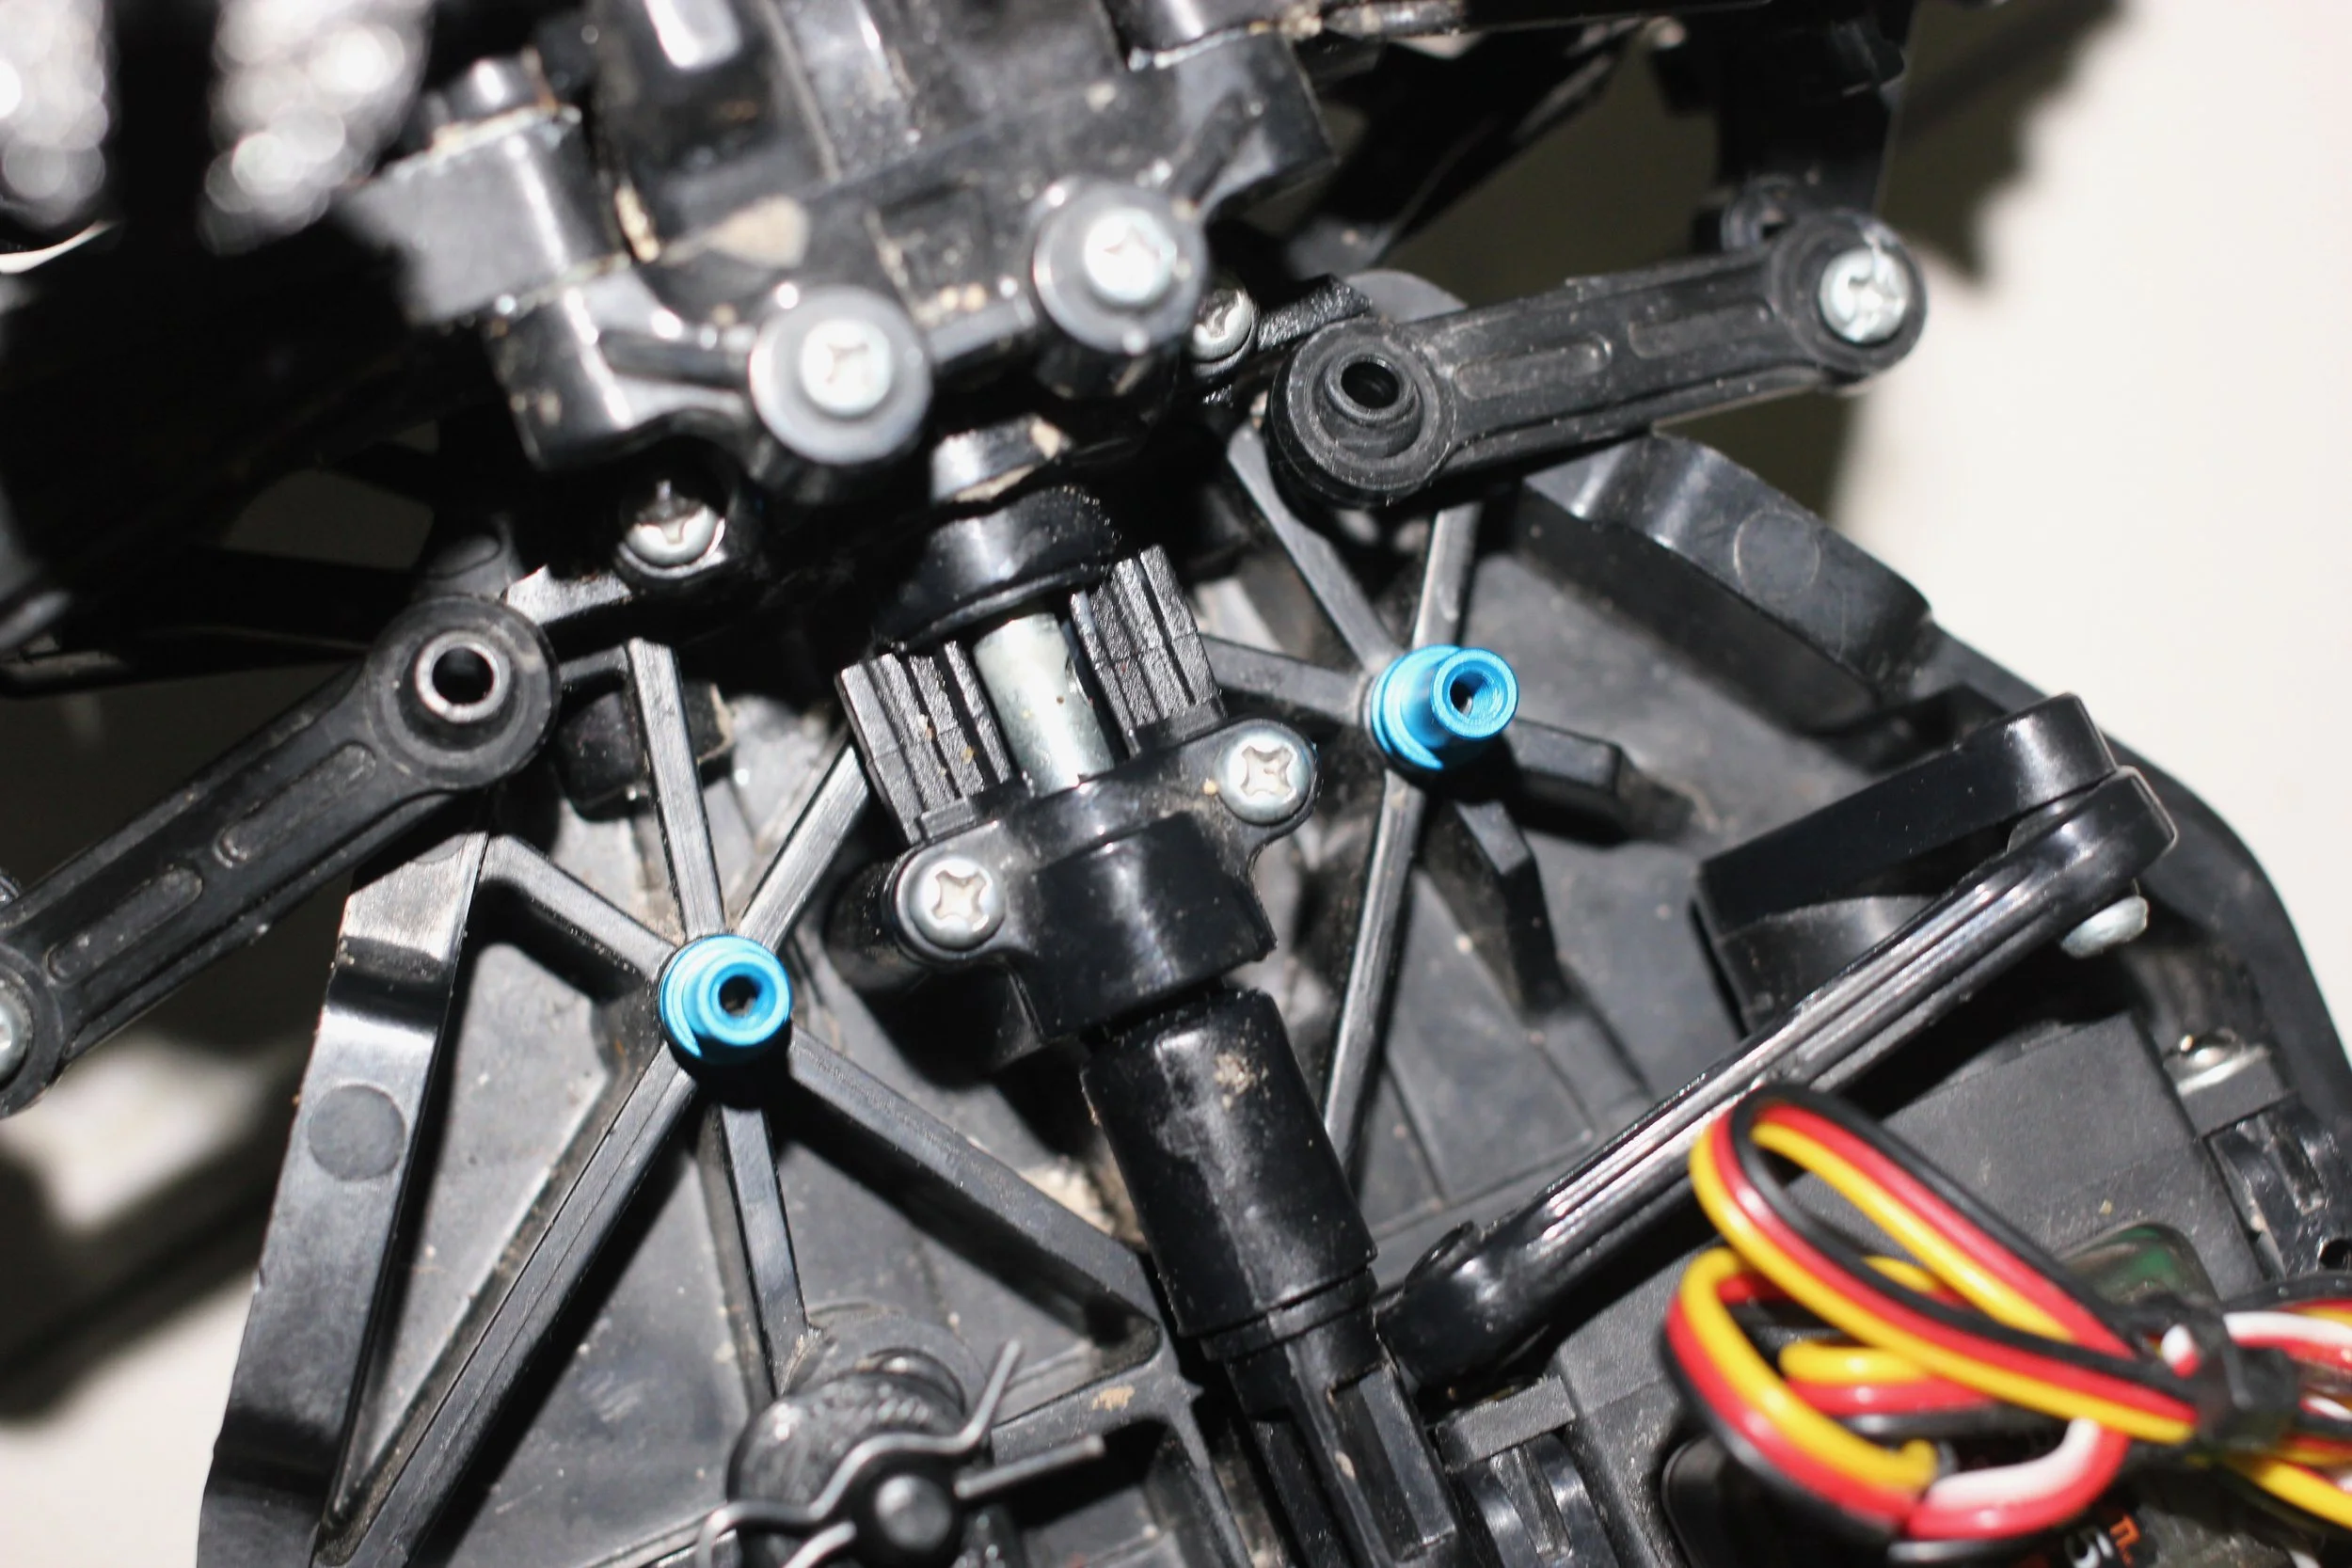
2) I then put the pins in the chassis. They thread in with a 2.5 hex key.... at least I think that was the size. It is small, like really small! However, my ifixit toolkit came in handy again. Yup, I get clams if you buy it through the link. You will notice that you leave the steering arms along, and you put the blue pins into the chassis. These are just threaded pins basically. They thread into the hole in the plastic chassis.
3) You put the anodized blue (mMMmmmMMMm anodized (Homer Simpson Voice) aluminum) over the pins you just threaded into the chassis. They go as follows:
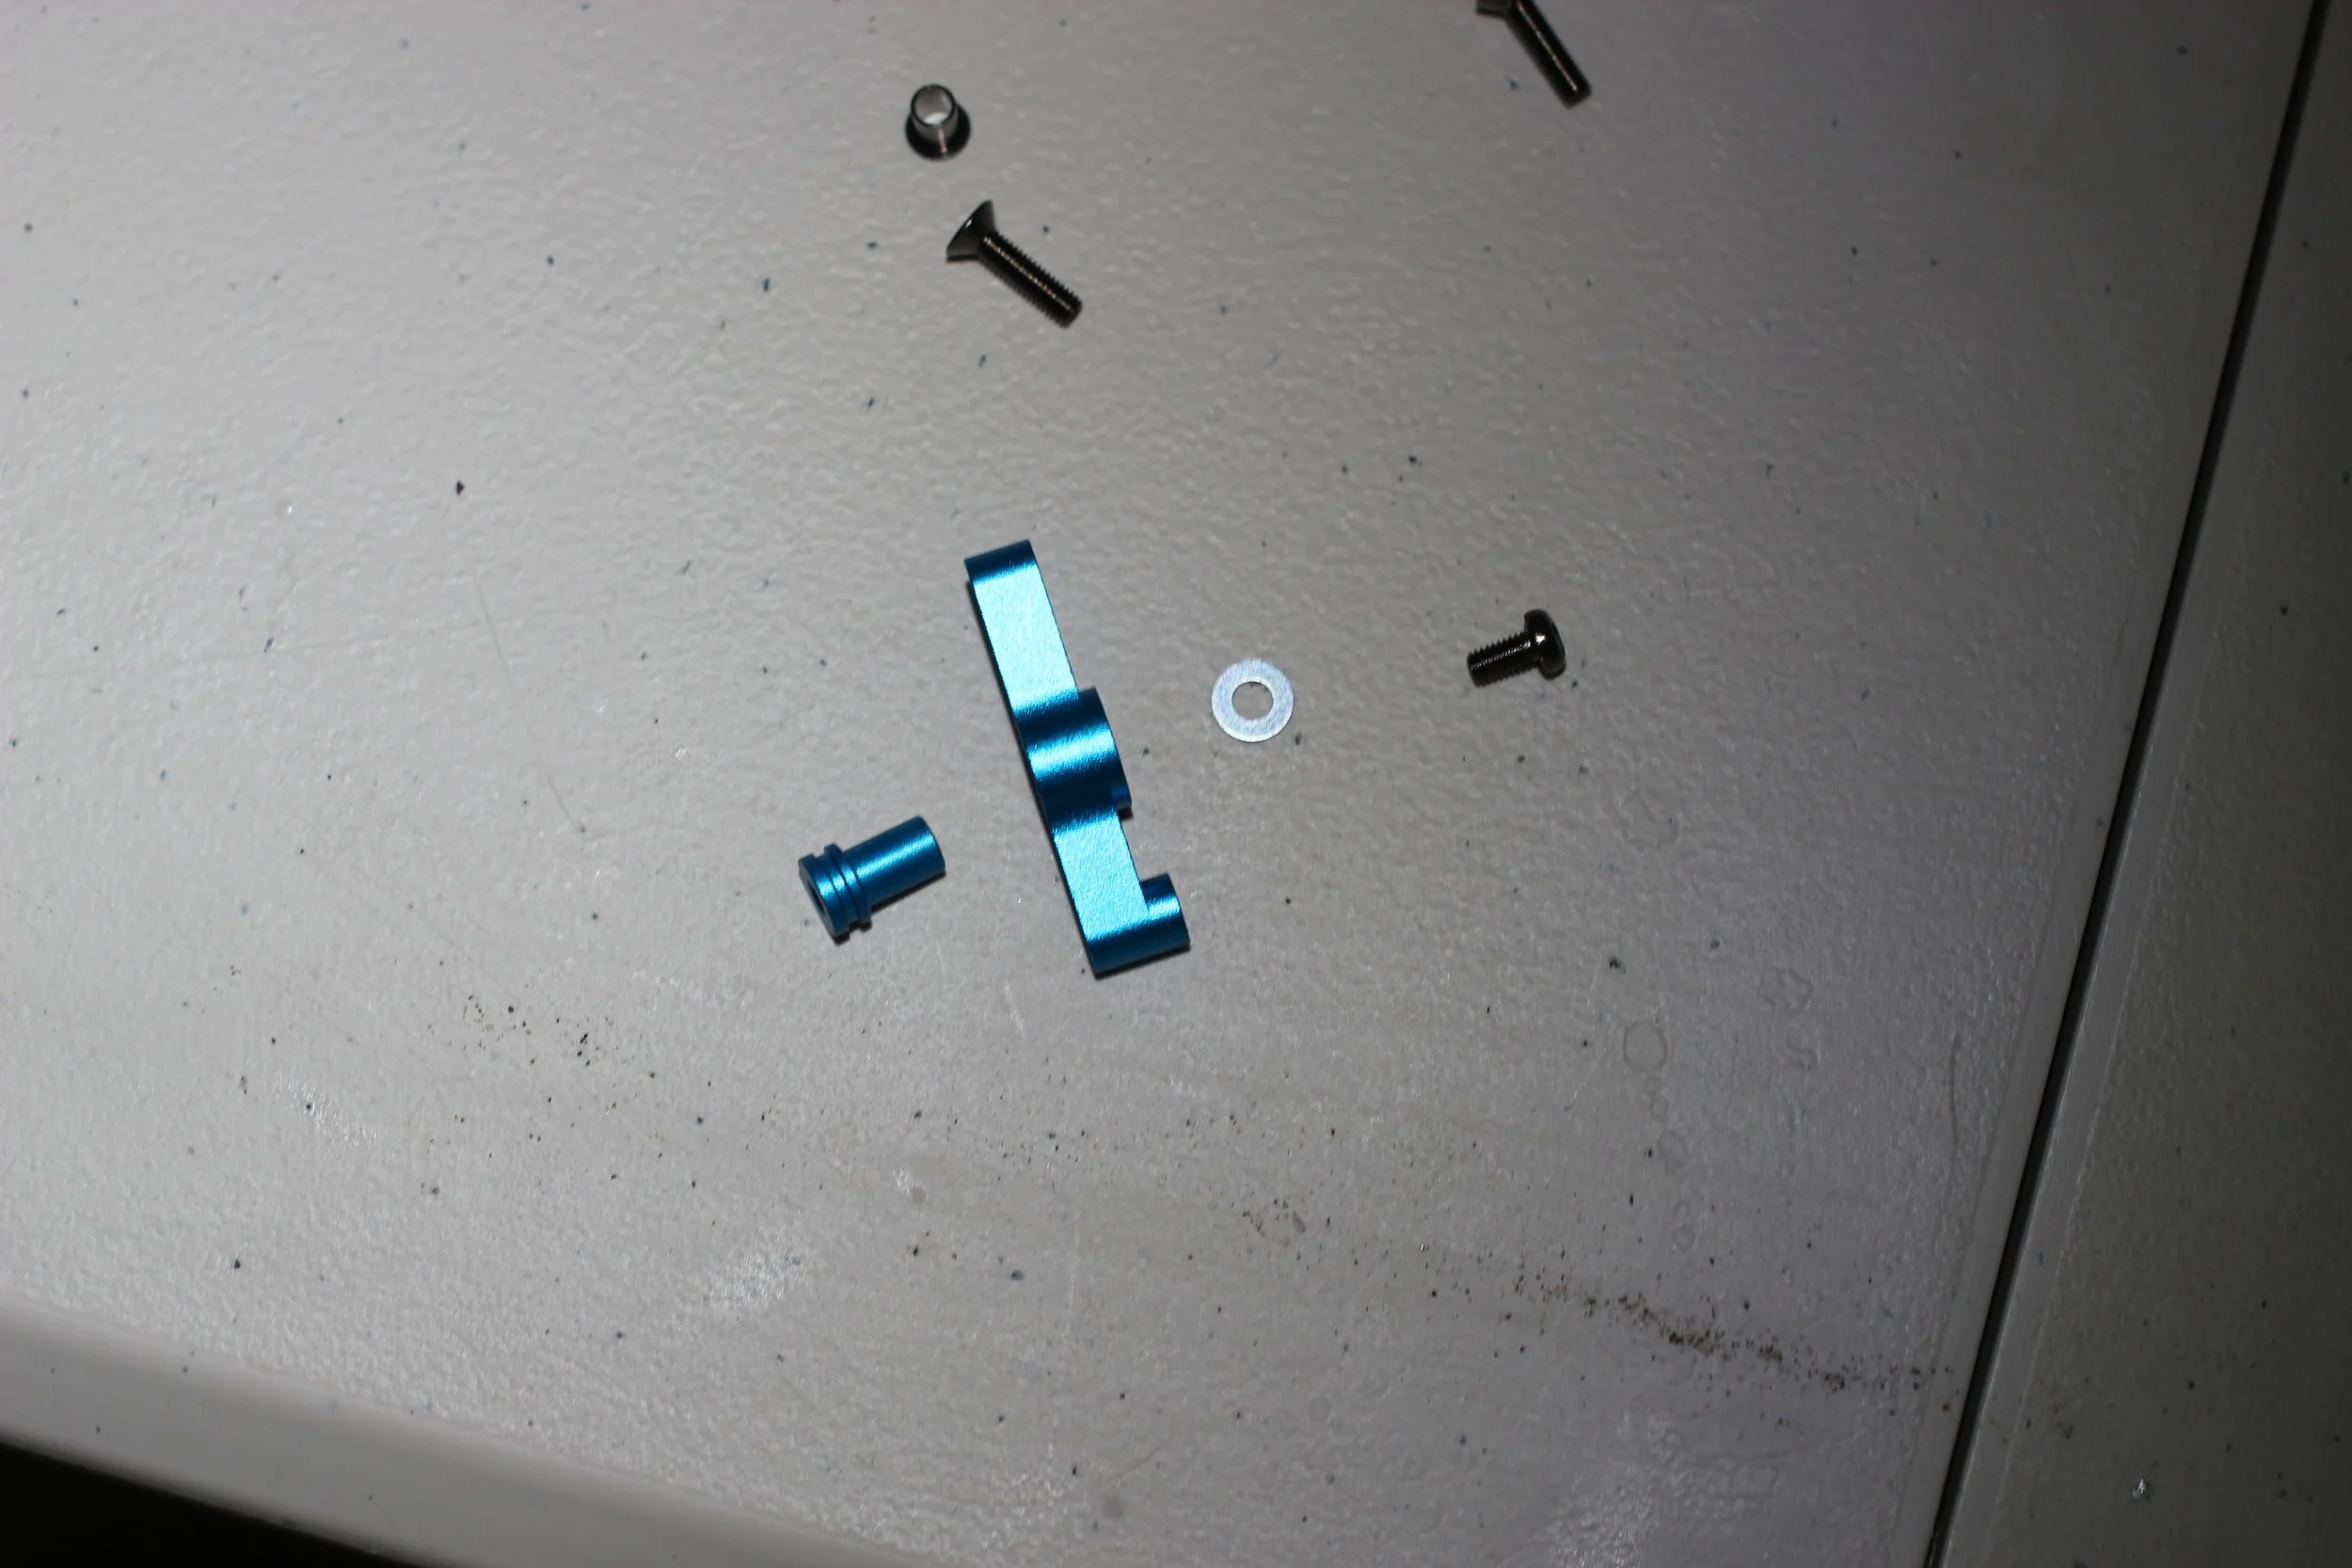
(The anondized bushing, the steering arm with the high side toward the back of the car, the washer, and then the screw)
If everything went well, you should have the bushings set in place as below. The bushings just thread onto the threaded pins hand-tight.
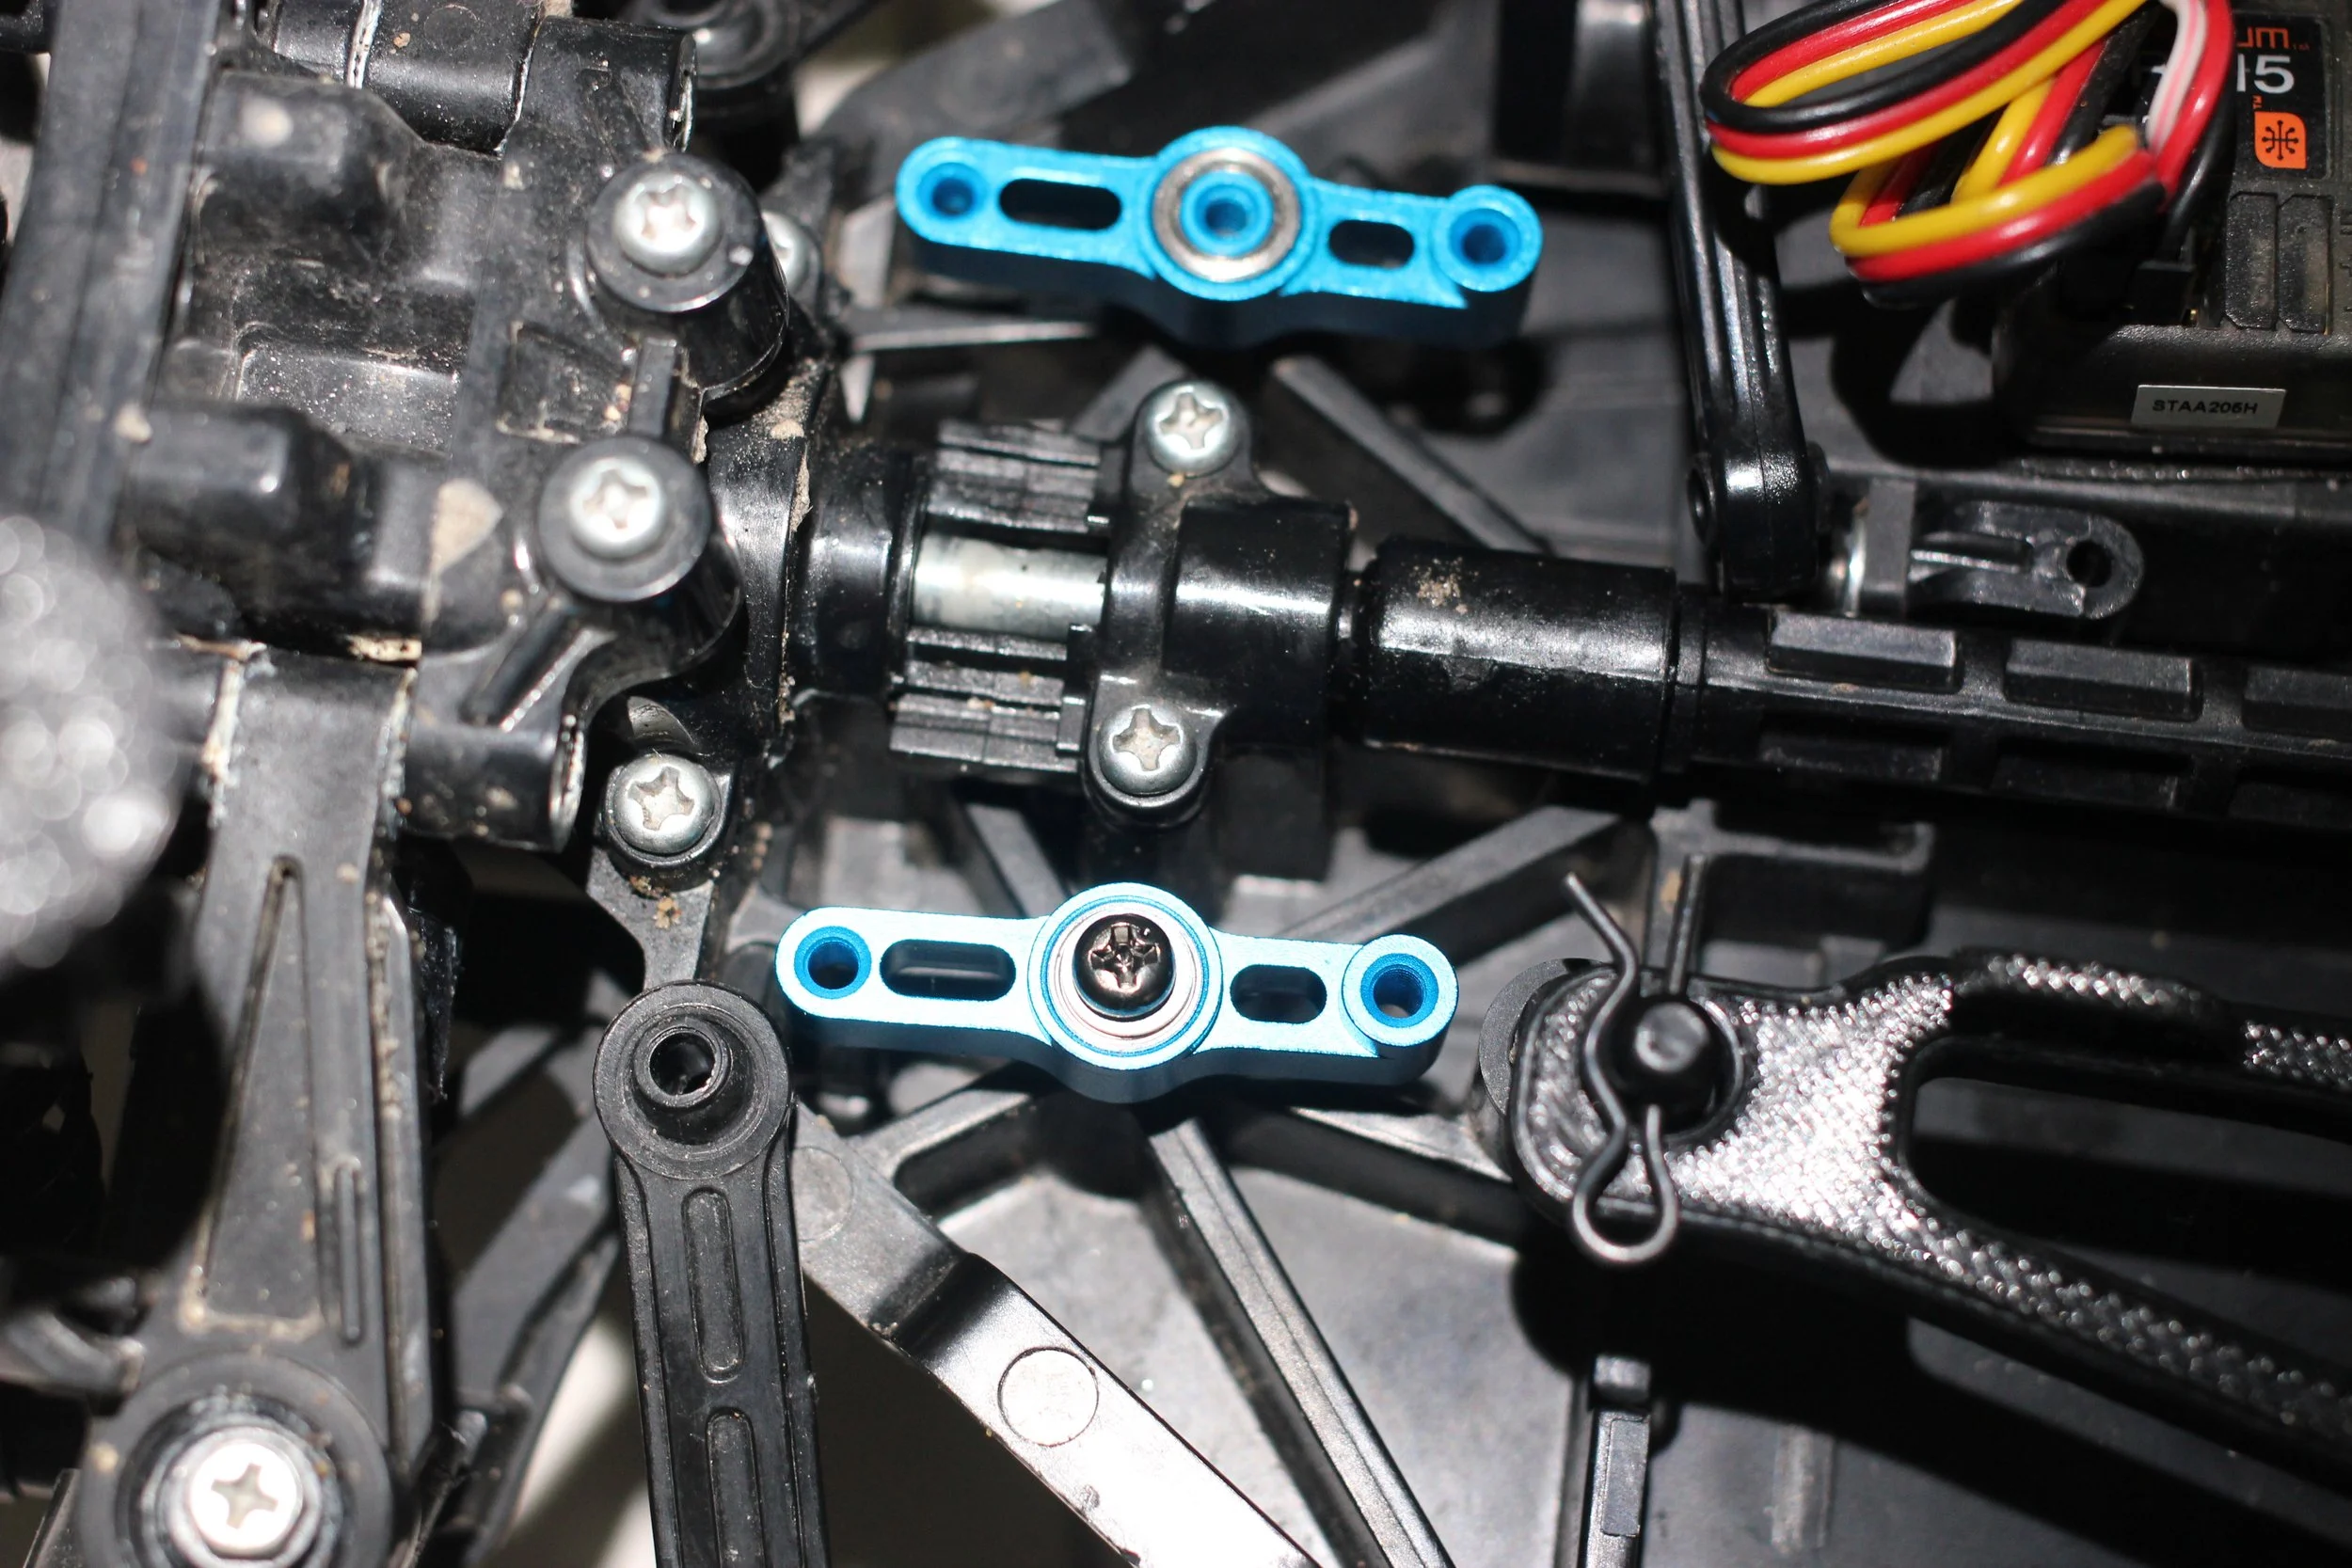
4) I connected the steering arms. Note that the arms are on top of the aluminum arms. You simply used the supplied machine screws. Note that one of the arms has a longer machined hole. If you reverse this, you will not be able to connect the steering linkage to the wheels. (See the image above)
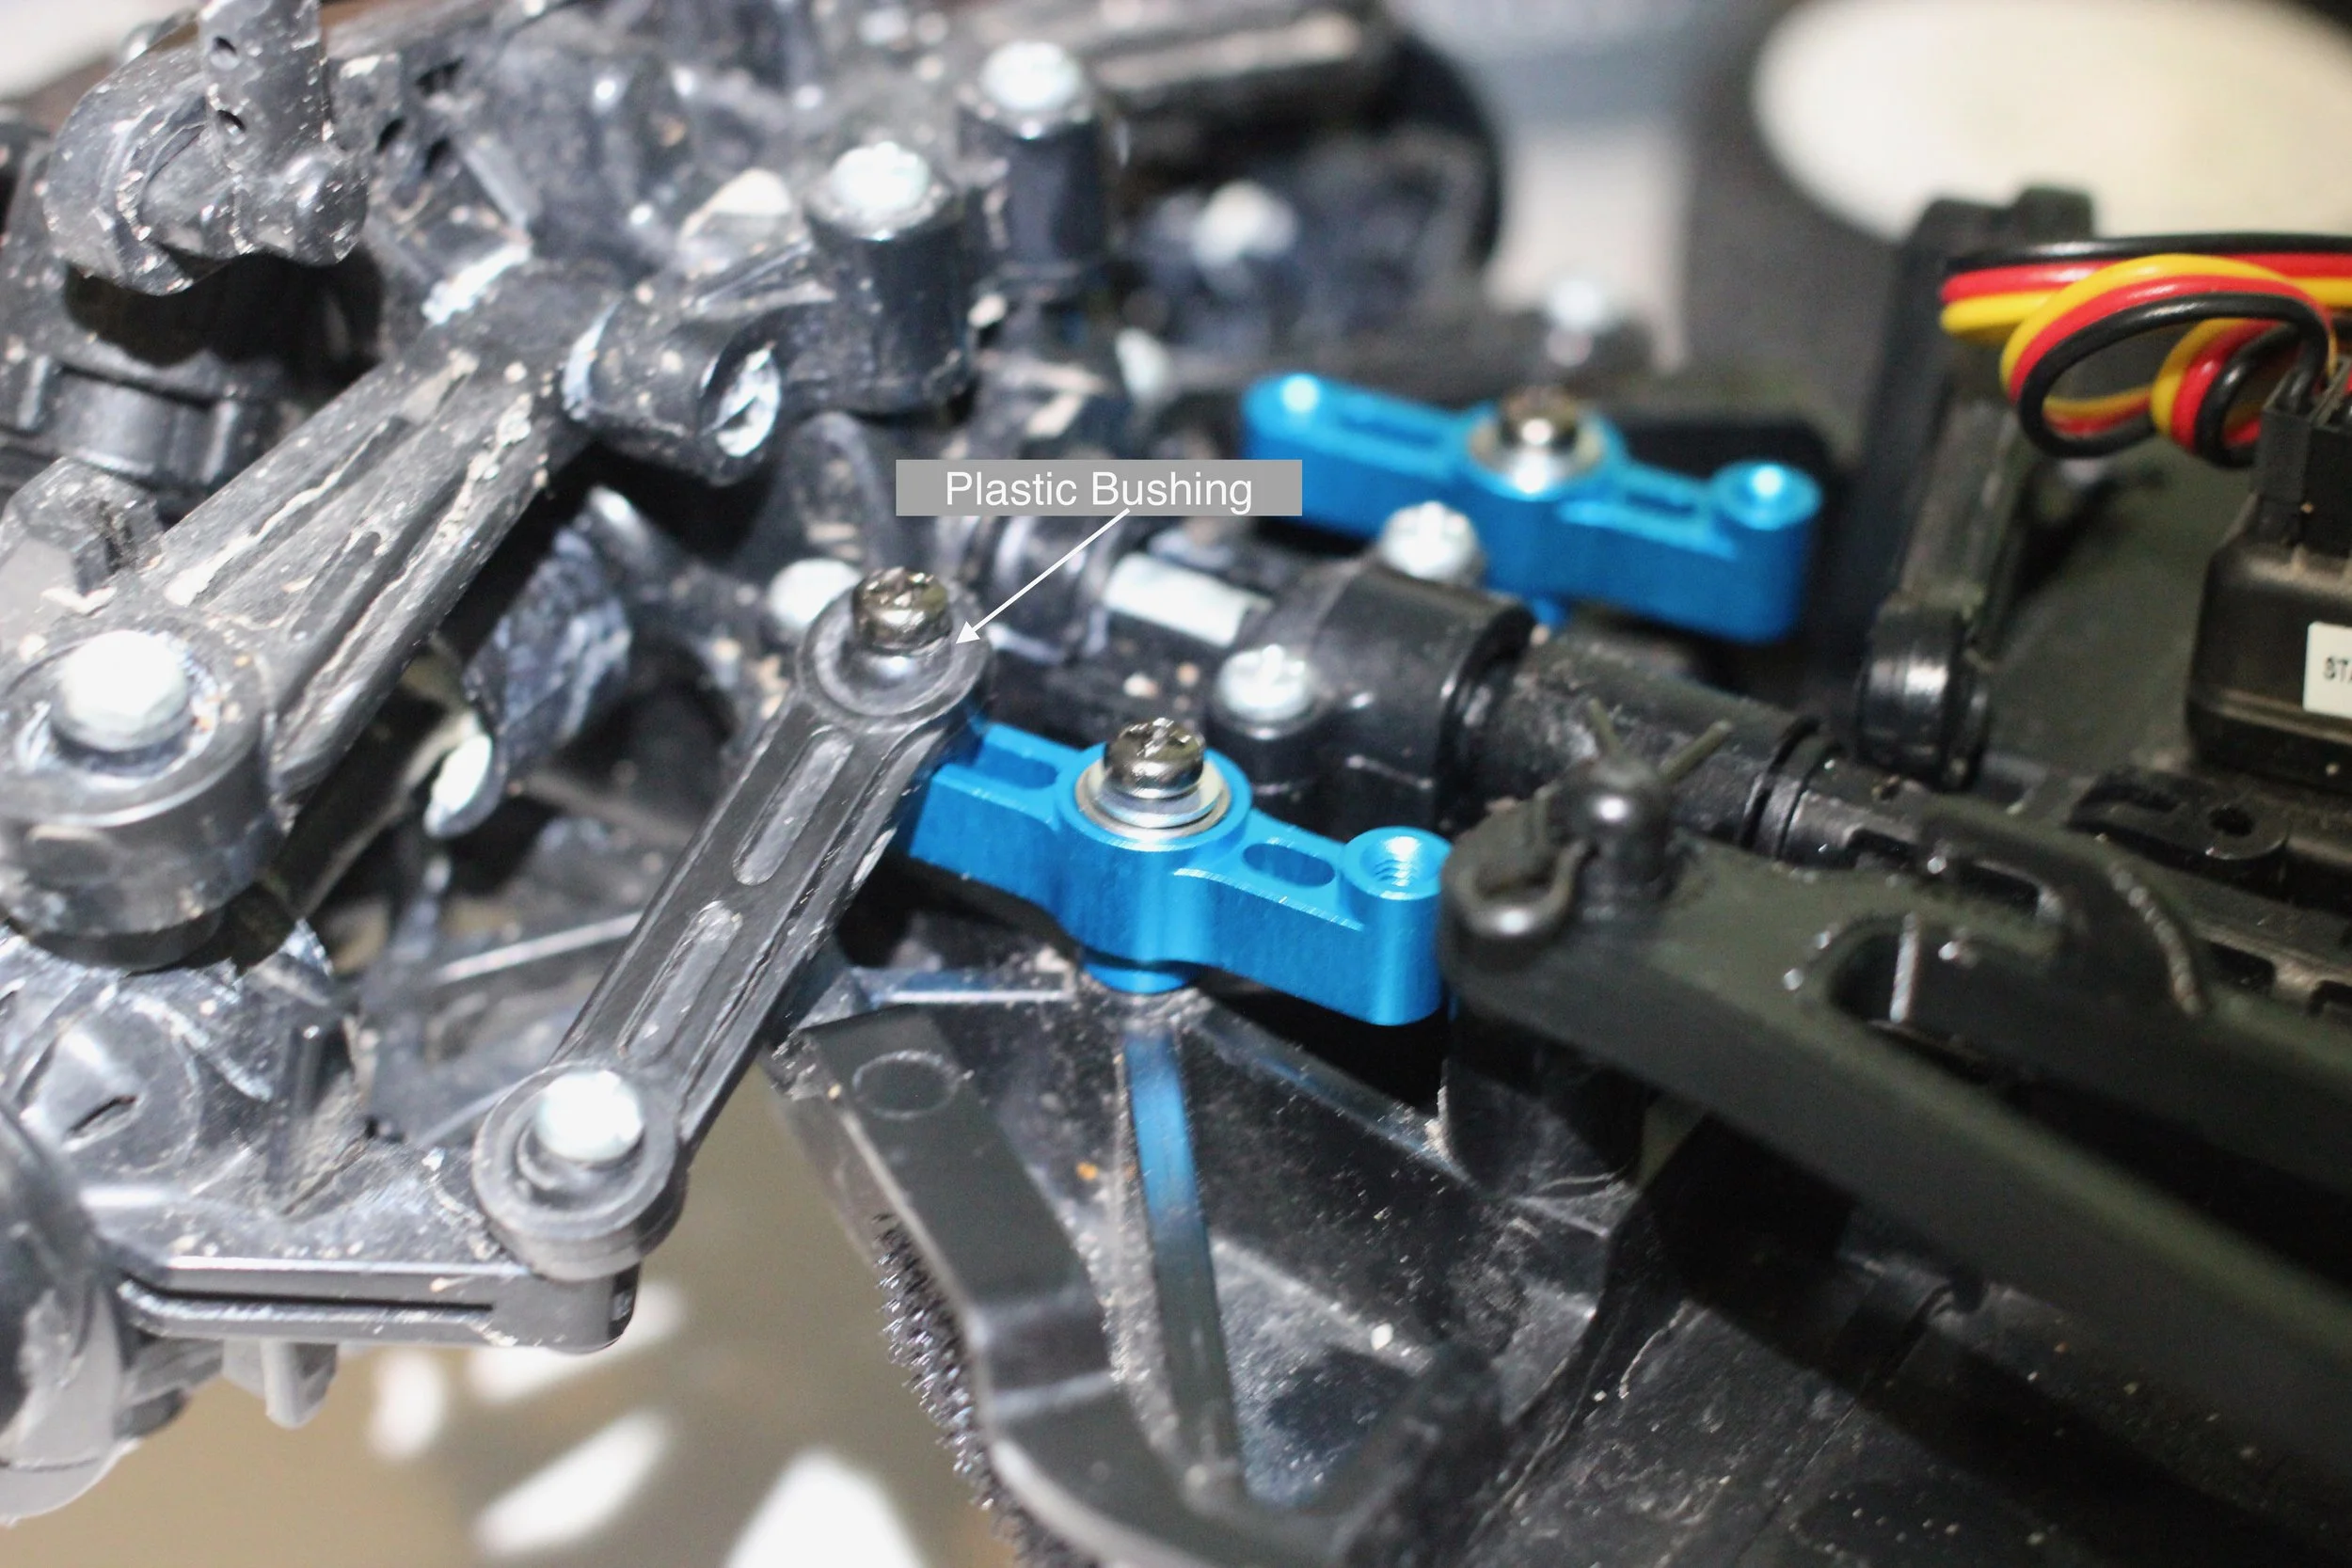
5) I put the small bushings in the plastic steering arm that connects the servo arm to the steering linkage. These can be a bit trying. I slid the bushing into the plastic piece. I then placed it on top of the arm. I was able to attach the screw and I left it loose so there was plenty of play. Once I got one side done, I was able to repeat the step on the other side.
6) I turned everything by hand before connecting the servo. It moved smoothly and looked good. At least it did not appear like anything was going to blow up. My main thing was to make sure that when I connected it back to the servo that I did not destroy the steering. Thankfully, it all went together correctly. I did my celebratory Lego Batman, “First TRY!” Thankfully, this time it really was my first try.
7) I tightened everything down and made sure everything was very snug before attaching the steering to the servo.
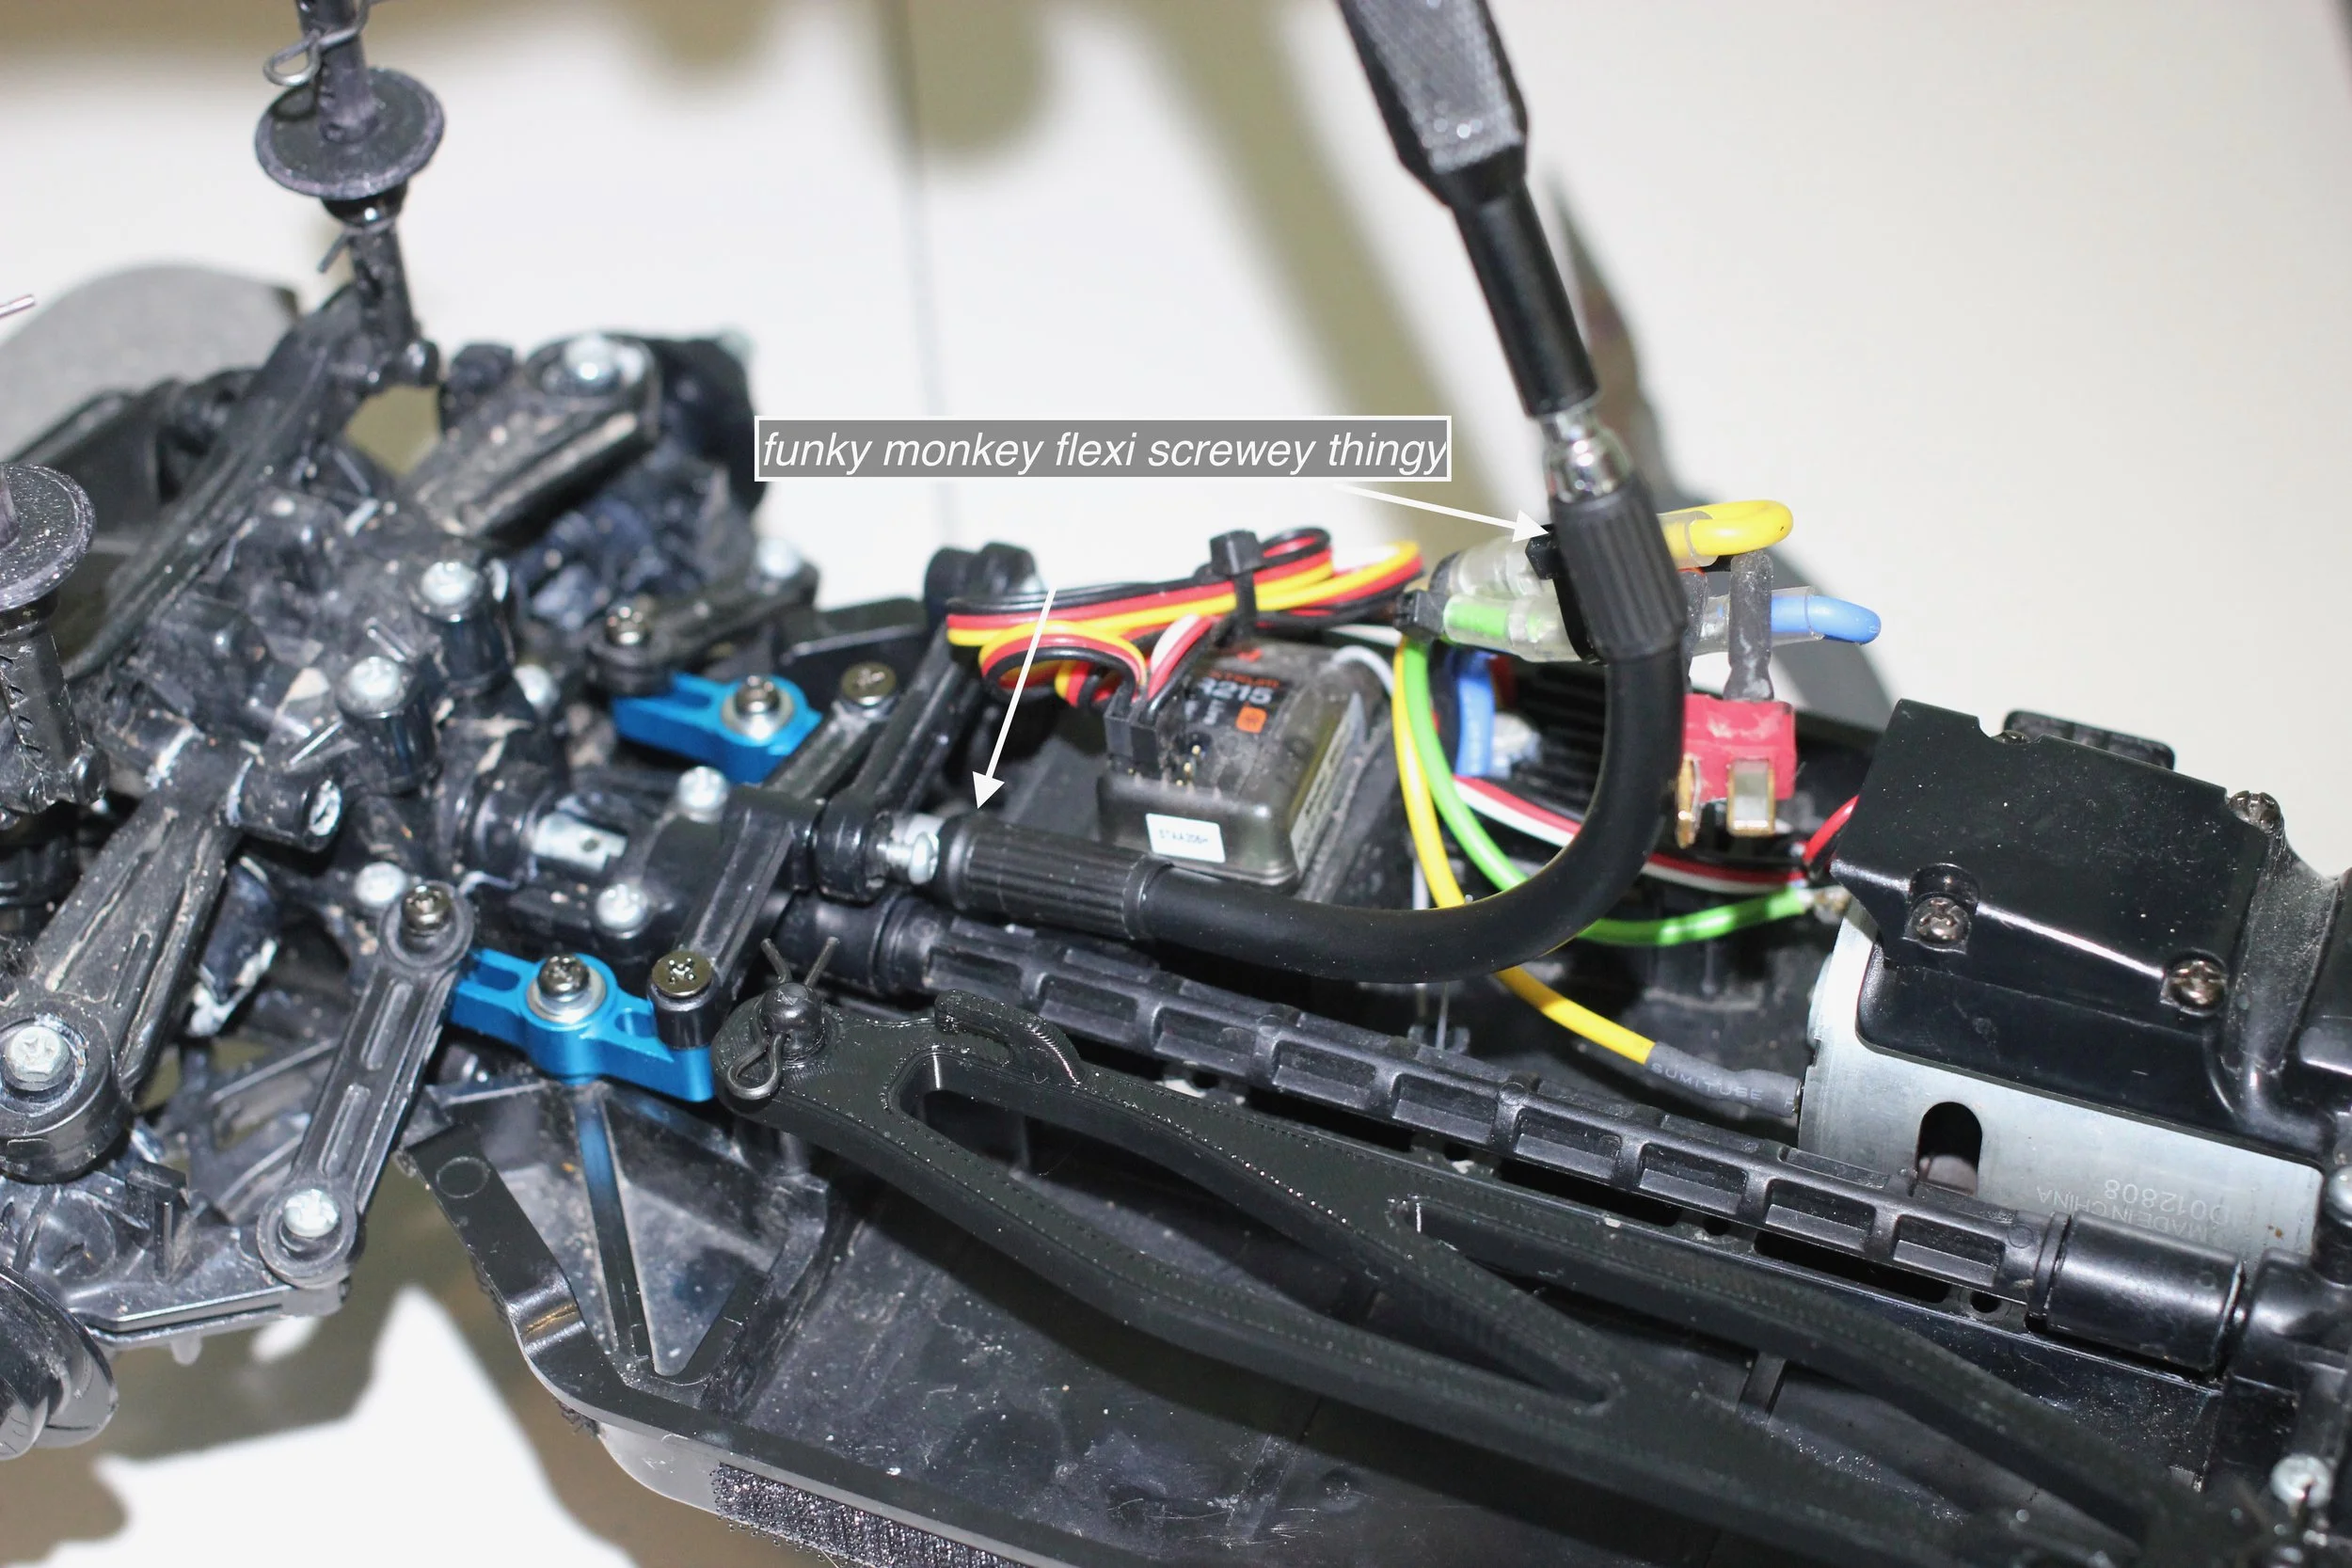
8) I connected the arm to the servo. This is where the iFixit tool is really handy (I get clams). I could take the funky monkey flexi screwey thingy.... I am pretty sure that is the technical term. I could then hold the screw bit against the screw and start getting the screw finger tight. This part of the toolkit is handier than trying to hang around radiation plants in the hopes that I would grow another arm and hand. By the way, the radiation doesn’t make you grow another arm… it’s better not to discuss what happens. However, the green steaming toilet water post-urination is a little disturbing. It goes away.....eventually. At least, that is what the doctor told me. Seriously, the picture below shows how I buttoned up the hatch…. or attached the steering to the servo.
Conclusion
Done! Turn on the controller, give it a couple of turns to make sure you are not going to snap it. Seriously, turn it slowly to make sure that everything moves back and forth like it is supposed to move, without twisting the chassis. Take it out and drive the snot out of it! It should be more durable. I think this whole process took about 30 minutes, with pictures and getting the tools out.
I planned to post a video, but I think I cooked the motor on the test drive. It is okay because the current motor in the car worked pretty hard during the winter. My son dropped a 13t brushed motor in his M-05. I did not know that a bushed motor would make such a difference, but that car is getting legit fast. We are still testing it to see if that motor is a Paulie’s pick! However, this upgrade is DEFINITELY a Paulie’s pick with the swear factor temptation being minimal!
Thanks again for reading. Until we meet again, may the Lord’s blessing and peace be upon you.